首页 > hadoop > 正文
原创文章,转载请注明出处!
本文链接:https://codetosurvive1.github.io/posts/cdh-environment-prepare.html
cdh环境搭建(一)环境准备
标签:大数据, 虚拟机, cdh, cloudera
2016-12-07
cdh环境搭建(一)环境准备
环境准备
1.卸载系统自带的jdk
查询系统自带jdk
rpm -qa | grep java
java-1.7.0-openjdk-1.7.0.9-2.3.4.1.el6_3.x86_64
java-1.5.0-gcj-1.5.0.0-29.1.el6.x86_64
tzdata-java-2012j-1.el6.noarch
java-1.6.0-openjdk-1.6.0.0-1.50.1.11.5.el6_3.x86_64
libreoffice-javafilter-3.4.5.2-16.1.el6_3.x86_64
java_cup-0.10k-5.el6.x86_64
卸载所有自带的jdk
sudo rpm -e --nodeps java-1.7.0-openjdk-1.7.0.9-2.3.4.1.el6_3.x86_64 java-1.5.0-gcj-1.5.0.0-29.1.el6.x86_64 tzdata-java-2012j-1.el6.noarch java-1.6.0-openjdk-1.6.0.0-1.50.1.11.5.el6_3.x86_64 libreoffice-javafilter-3.4.5.2-16.1.el6_3.x86_64 java_cup-0.10k-5.el6.x86_64
[sudo] password for centos:
2.关闭防火墙,并设置重启后也是关闭
$ sudo service iptables stop
iptables: Flushing firewall rules:                         [  OK  ]
iptables: Setting chains to policy ACCEPT: filter          [  OK  ]
iptables: Unloading modules:                               [  OK  ]
[centos@centos Desktop]$ sudo service iptables status
iptables: Firewall is not running.
[centos@centos Desktop]$ sudo chkconfig  iptables off


chkconfig --list | grep iptables
iptables       	0:off	1:off	2:off	3:off	4:off	5:off	6:off
3.添加用户及密码
切换到root用户,添加用户cdh,密码123456
[root@centos Desktop]# useradd cdh
[root@centos Desktop]# passwd cdh
Changing password for user cdh.
New password:
BAD PASSWORD: it is too simplistic/systematic
BAD PASSWORD: is too simple
Retype new password:
passwd: all authentication tokens updated successfully.
4.禁用ipv6
[root@centos Desktop]# echo "alia net-pf-10 off" >> /etc/modprobe.d/dist.conf
[root@centos Desktop]# echo "alia ipv6 off" >> /etc/modprobe.d/dist.conf
[root@centos Desktop]# tail -f /etc/modprobe.d/dist.conf
alias rpc_svc_gss_pipefs sunrpc

install eth1394 /bin/true

install snd-emu10k1 /sbin/modprobe --ignore-install snd-emu10k1 && /sbin/modprobe snd-emu10k1-synth

alias gre0 ip_gre
alias char-major-89-* i2c-dev
alia net-pf-10 off
alia ipv6 off
5.关闭selinux
vi /etc/sysconfig/selinux
修改为
SELINUX=disabled
6.修改用户打开最大进程数及最大文件句柄数
首先查看系统的默认配置
[root@centos Desktop]# ulimit -a
core file size          (blocks, -c) 0
data seg size           (kbytes, -d) unlimited
scheduling priority             (-e) 0
file size               (blocks, -f) unlimited
pending signals                 (-i) 7689
max locked memory       (kbytes, -l) 64
max memory size         (kbytes, -m) unlimited
open files                      (-n) 1024
pipe size            (512 bytes, -p) 8
POSIX message queues     (bytes, -q) 819200
real-time priority              (-r) 0
stack size              (kbytes, -s) 10240
cpu time               (seconds, -t) unlimited
max user processes              (-u) 7689
virtual memory          (kbytes, -v) unlimited
file locks                      (-x) unlimited

ulimit -u
7689
修改
vi /etc/security/limits.conf
*       soft    nofile  65535
*       hard    nofile  65535
*       soft    nproc   32000
*       hard    nproc   32000
7.修改sudoer(非必须)
8.修改主机名
9.修改主机名与ip映射关系
复制虚拟机后进行相关配置
1.复制之前的centos虚拟机
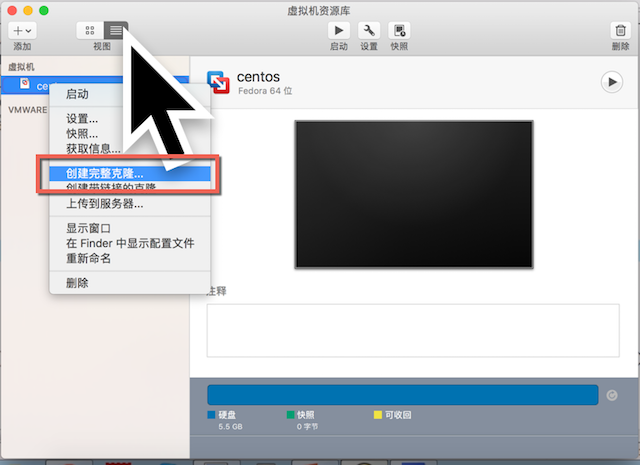
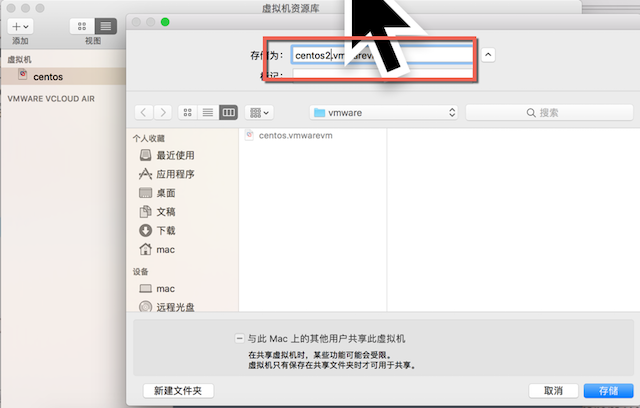
2.将centos复制两次后如下图所示
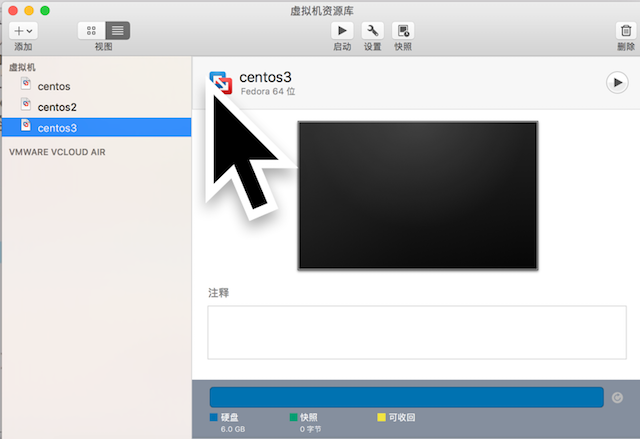
3.分别修改主机名称为centos2.com及centos3.com
4.集群时间同步,这里使用centos作为主服务器,其他两台的时间根据centos时间进行同步,软件使用ntp进行同步时间 修改第一台centos的ntp配置文件
sudo vi /etc/ntp.conf
总共需要修改三处
将下面一行取消注释, 并将restrict后的网段修改为自己的ip网段
restrict 192.168.4.0 mask 255.255.255.0 nomodify notrap
注释掉下面三行
#server 0.centos.pool.ntp.org
#server 1.centos.pool.ntp.org
#server 2.centos.pool.ntp.org
将下面两行释放开
server  127.127.1.0     # local clock
fudge   127.127.1.0 stratum 10
修改centos的ntp服务器配置
vi /etc/sysconfig/ntpd
在该文件开始添加下面一行配置
SYNC_HWCLOCK=yes
启动服务端
[cdh@centos Desktop]$ sudo service ntpd status
ntpd is stopped
[cdh@centos Desktop]$ sudo service ntpd start
Starting ntpd:                                             [  OK  ]
[cdh@centos Desktop]$ sudo service ntpd status
ntpd (pid  3470) is running...
[cdh@centos Desktop]$ sudo chkconfig ntpd on
[cdh@centos Desktop]$ sudo chkconfig --list | grep ntp
ntpd           	0:off	1:off	2:on	3:on	4:on	5:on	6:off
ntpdate        	0:off	1:off	2:off	3:off	4:off	5:off	6:off
在centos2和centos3客户端中添加linux的contable定时任务来同步机器时间
 su
Password:
[root@centos3 Desktop]# crontab -e
添加如下内容进行时间同步,192.168.4.129为centos时间服务器的ip地址
0-59/10 * * * * /usr/sbin/ntpdate 192.168.4.129
直接测试下,同步时间效果,会报错,这是由于server启动后需要过几分钟才能在从节点上进行同步时间
[root@centos3 Desktop]# /usr/sbin/ntpdate 192.168.4.129

 7 Dec 04:51:41 ntpdate[3580]: no server suitable for synchronization found
过几分钟后重新尝试,同步成功
[root@centos3 Desktop]# /usr/sbin/ntpdate 192.168.4.129
 6 Dec 22:56:59 ntpdate[3658]: adjust time server 192.168.4.129 offset 0.001352 sec
[root@centos3 Desktop]# date
Tue Dec  6 22:58:25 CST 2016
原创文章,转载请注明出处!
本文链接:https://codetosurvive1.github.io/posts/cdh-environment-prepare.html