macaca源码分析-android-uiautomator
  由于新手接触自动化来说,很多知识需要恶补,其中对于自动化脚本是如何通过指令发送到手机,感觉很是神奇,因此对于macaca中如何通过脚本操控手机这块进行了相关的研究,发现,在macaca中,操控安卓手机主要有两种方式:
  1.  直接对底层adb指令进行封装,上层进行相关调用,比如截图啊、查询设备啊之类
  2.  通过安卓自动化框架封装的Uiautomator进行相关封装
  本文主要分析macaca中对于Uiautomator的封装的讨论
前提准备
  1.  macaca-adb
  2.  macaca-android
  3.  uiautomator-client
软件下载方式
可以通过两种方式获取:
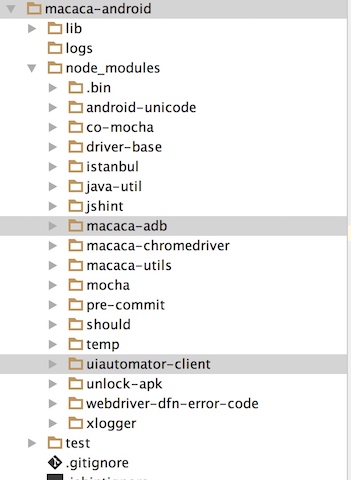
      1. 安装macaca-cli及android驱动,[可以参考macaca环境搭建](https://codetosurvive1.github.io/posts/macaca-environment.html),安装成功后会在对应的目录下生成node_moduels下,可以直接查看/usr/local/lib/node_modules/macaca-android驱动,该驱动依赖于macaca-adb以及uiautomator-client
      2. 源码方式查看,直接从github下载源代码并安装相关依赖包
软件下载
这里直接使用上面的第二种方式,源码下载安装方式查看
1.下载源代码
mac:macaca mac$ git clone https://github.com/macacajs/macaca-android.git
Cloning into 'macaca-android'...
remote: Counting objects: 337, done.
remote: Compressing objects: 100% (35/35), done.
remote: Total 337 (delta 22), reused 0 (delta 0), pack-reused 302
Receiving objects: 100% (337/337), 54.47 KiB | 64.00 KiB/s, done.
Resolving deltas: 100% (222/222), done.
Checking connectivity... done.
2.安装依赖
mac:macaca mac$ cd macaca-android/
mac:macaca-android mac$ npm install
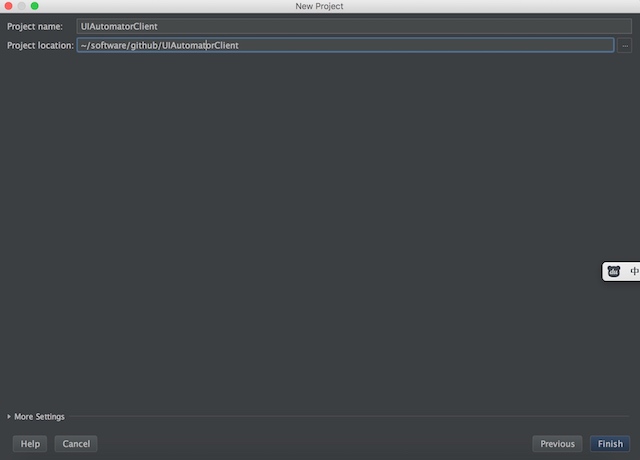
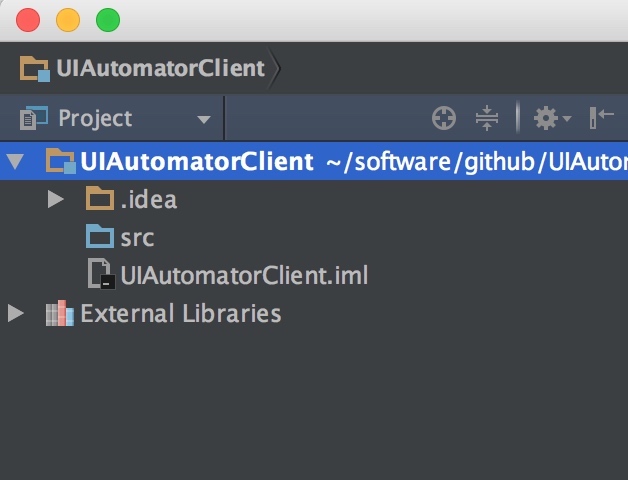
3.这里使用webstorm打开macaca-android工程
webstorm中工程截图如下
源码分析
macaca-android代码目录lib下核心代码为controllers.js和macaca-android.js
macaca-android.js中构造函数
class Android extends DriverBase {
  constructor() {
    super();
    this.adb = null;
    this.apkInfo = null;
    this.args = null;
    this.chromedriver = null;
    this.chromeDriverPort = null;
    this.proxy = null;
    this.udid = null;
    this.uiautomator = null;
    this.isChrome = null;
    this.isVirtual = true;
    this.moveToPosition = null;
    this.contexts = [];
  }
}
启动设备
Android.prototype.startDevice = function *(caps) {
  this.args = _.clone(caps);
  this.isChrome = this.args.browserName && this.args.browserName.toLowerCase() === 'chrome';
  yield JAVA.getVersion();
  this.initReuse();
  this.initAdb();
  yield this.initDevice();
  yield this.initUiautomator();//初始化UIautomator
  yield this.getApkInfo();
  yield this.unlock();
  yield this.setIME();
  yield this.launchApk();
  yield this.waitActivityReady();

  if (this.isChrome) {
    yield this.getWebviews();
  }
};
  Android.prototype.initUiautomator = function *() {
  this.uiautomator = new UIAutomator();
  yield this.uiautomator.init(this.adb);
  };
UIAutomator引入包uiautomator-client
const UIAutomator = require('uiautomator-client');
查看uiautomator-client包下lib下的uiautomator-client.js
UIAutomator的构造函数及init方法
function UIAutomator() {
  this.adb = null;
  this.socket = null;
  this.socketPort = 6789;
  this.queue = [];
}
UIAutomator.prototype.init = function *(adb) {
  this.adb = adb;
  const ANDROID_TMP_DIR = this.adb.getTmpDir();

  try {
    yield this.adb.rm(`${ANDROID_TMP_DIR}/${FILE_NAME}.jar`);
  } catch (e) {

  }
  if (!_.isExistedFile(binPath)) {
    logger.error(`uiautomator-bootstrap was not found in: ${binPath}, please check your Android ENV`);
    return;
  }
  yield this.adb.push(binPath, ANDROID_TMP_DIR);
  try {
    yield this.adb.killProcess('uiautomator');
  } catch (e) {

  }
  yield this.adb.forward(this.socketPort, this.socketPort);
  yield this.initSocketServer();
  yield this.initSocketClient();
};
从上面的构造函数及init方法中可以看出,默认构造了6789端口,然后调用init初始化方法中,首先删除了安卓手机临时目录’/data/local/tmp’中的uiautomator-bootstrap.jar包,然后上传jar包到临时目录下,并杀掉手机中的uiautomator进程,并将手机端口与电脑端口进行映射,最后初始化手机端的服务器及电脑端的客户端连接。
UIAutomator.prototype.initSocketServer = function() {
  return new Promise((resolve, reject) => {
    const ANDROID_TMP_DIR = this.adb.getTmpDir();
    let args = `shell uiautomator runtest ${ANDROID_TMP_DIR}/${FILE_NAME}.jar -c ${CLASS_NAME} -e port ${this.socketPort} -e flag ${READY_FLAG}`.split(' ');

    var proc = this.adb.spawn(args, {
      path: process.cwd(),
      env: process.env
    });

    proc.stderr.setEncoding('utf8');
    proc.stdout.setEncoding('utf8');
    proc.stdout.on('data', data => {
      if (!!~data.indexOf(READY_FLAG)) {
        logger.info('socket server ready');
        resolve();
      } else {
        console.log(data);
      }
    });
    proc.stderr.on('data', data => {
      console.log(data);
    });
  });
};
初始化手机服务端方法中,可以看出是直接调用通过adb shell调用手机中的uiautomator执行uiautomator的测试集adb shell uiautomator runtest ${ANDROID_TMP_DIR}/${FILE_NAME}.jar -c ${CLASS_NAME} -e port ${this.socketPort} -e flag ${READY_FLAG},这里的${ANDROID_TMP_DIR}/${FILE_NAME}.jar指的是/data/local/tmp/uiautomator-bootstrap.jar,-c指定要运行的测试类,即为com.android.uiautomator.client.Initialize,-e指定参数,这里指定了两个参数,一个是port,一个是flag
UIAutomator.prototype.initSocketClient = function() {
  return new Promise((resolve, reject) => {
    this.socket = net.connect(this.socketPort, () => {
      logger.info('socket client ready');
      resolve();
    });

    var tempData = '';
    this.socket.setEncoding('utf8');
    this.socket.on('data', data => {
      try {
        let res = JSON.parse(tempData + data);
        tempData = '';
        let success = res.success;

        if (success) {
          this.queue.shift().resolve(res.data);
        } else {
          this.queue.shift().reject();
        }
      } catch (e) {
        tempData += data;
      }
    });
    this.socket.on('end', () => {
      logger.warn('connect lost');
    });
  });
};
电脑客户端连接比较简单,直接连接上服务端,并注册监听事件。
UIAutomator.prototype.send = function *(cmd) {
  var defer = new _.Defer();
  defer.promise.then(data => {
  });
  this.queue.push(defer);
  this.socket.write(`${JSON.stringify(cmd)}\n`);
  return yield defer.promise;
};
这是另外的一个发送的方法send,直接将指令发送到服务端,该方法的调用在macaca-android.js中,这里很简单直接调用并返回响应码
Android.prototype.send = function *(data) {
  try {
    var result = yield this.uiautomator.send(data);
  } catch (err) {
    logger.debug(`UnknownError from uiautomator ${err}`);
    throw new errors.UnknownError();
  }
  var statusCode = result.status;
  if (statusCode === 0) {
    return result.value;
  } else {
    var errName = getErrorByCode(statusCode);
    if (!errName) {
      throw new errors.UnknownError();
    }
    throw new errors[errName](result.value);
  }
};
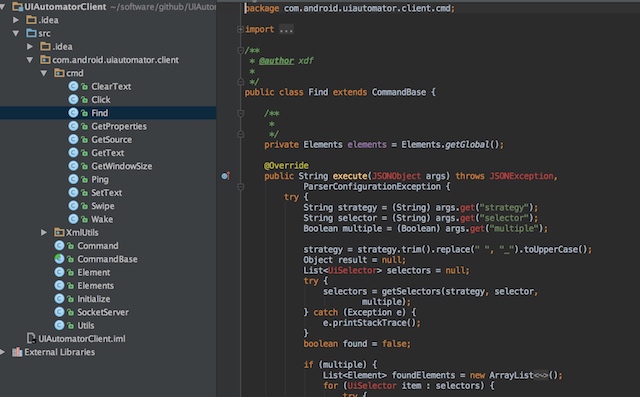
手机端uiautomator源码导入
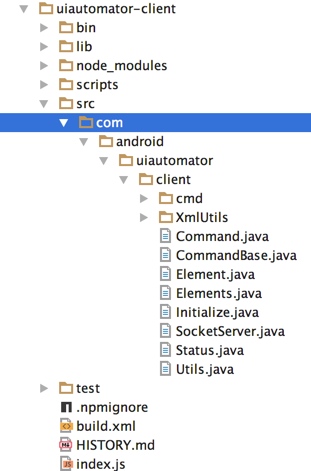
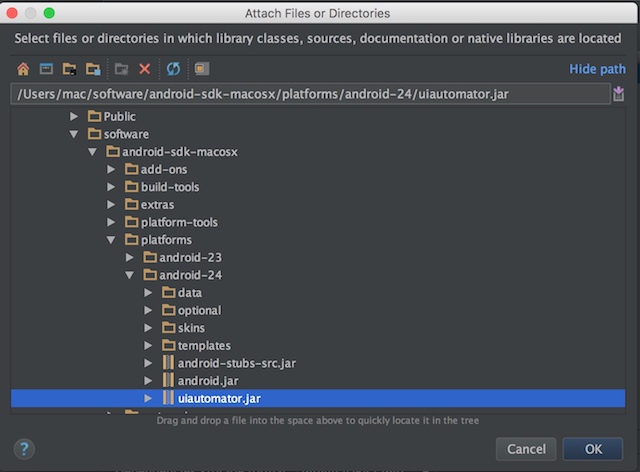
从这里的目录可以看出macaca中对于uiautomator的java源代码封装,下面使用idea进行相关源码导入或者直接通过github下载并添加lib下的jar包
1.建立普通java工程
2.uiautomator-client目录下的src拷贝到创建的java工程中
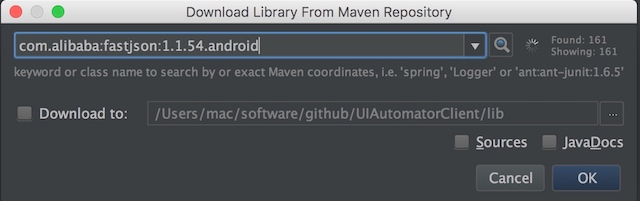
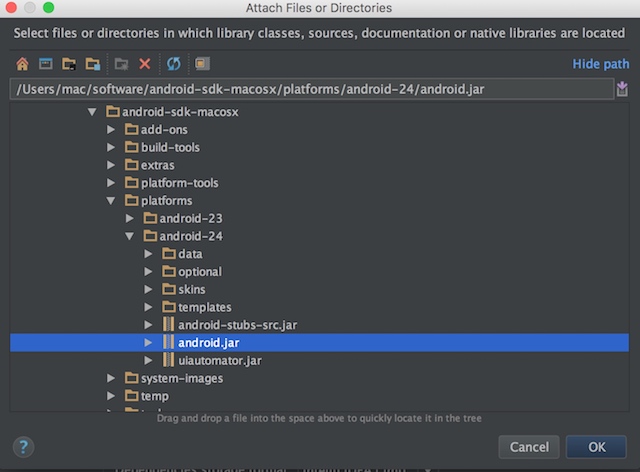
3.添加uiatuomator,android,及fastjson的jar包,添加成功后,代码中不报错


手机端uiautomator源码分析
1.直接查看上面js中指定的com.android.uiautomator.client.Initialize源码
public class Initialize extends UiAutomatorTestCase {

	/**
	 * @throws IOException
	 * @throws JSONException
	 * @throws ParserConfigurationException
	 */
	public void testStartServer() throws IOException, JSONException,
			ParserConfigurationException {
		Utils.output("uiautomator start socket server.");
		int port = Integer.parseInt(getParams().getString("port"));
		String readyFlag = getParams().getString("flag");
		SocketServer server = new SocketServer(port);
		server.listen(readyFlag);
	}
}
可以看出,该类直接继承自uiautomator框架中的UiAutomatorTestCase,该方法直接获取传递进来的参数port和flag,并传递给SocketServer类
2.SocketServer类是简单的java tcp服务端实现类
public class SocketServer {

	private ServerSocket server;

	public SocketServer(int port) throws IOException {
		setServer(new ServerSocket(port));
	}

	/**
	 * @param readyFlag
	 * @throws JSONException
	 * @throws ParserConfigurationException
	 */
	public void listen(String readyFlag) throws JSONException,
			ParserConfigurationException {
		Utils.output(readyFlag);
		try {
			Socket client = server.accept();
			BufferedReader input = new BufferedReader(new InputStreamReader(
					client.getInputStream(), "UTF-8"));
			BufferedWriter output = new BufferedWriter(new OutputStreamWriter(
					client.getOutputStream(), "UTF-8"));
			StringBuilder swap = new StringBuilder();

			while (true) {
				swap.setLength(0);
				int chunk;
				while ((chunk = input.read()) != -1 && input.ready()) {
					swap.append((char) chunk);
				}
				String str = swap.toString();
				Utils.output("recive: " + str);
				String res = Command.handleInput(str);
				Utils.output("return: " + res);
				output.write(res);
				output.flush();
			}
		} catch (final IOException e) {

		}
	}

	/**
	 * @return res
	 */

	public ServerSocket getServer() {
		return server;
	}

	/**
	 * @param server
	 */
	public void setServer(ServerSocket server) {
		this.server = server;
	}
}
该类的核心代码在listen方法,该方法即为死循环,不停的接受发送过来的指令,然后处理执行Command.handleInput,并将处理的结果返回
3.Command.handleInput处理接受到的指令并解析,并根据命令将命令参数传递给不同的实现类
public class Command {
	/**
	 *
	 */
	private static HashMap<String, CommandBase> map = new HashMap<String, CommandBase>();

	static {
		getMap().put("ping", new Ping());
		getMap().put("wake", new Wake());
		getMap().put("find", new Find());
		getMap().put("setText", new SetText());
		getMap().put("getText", new GetText());
		getMap().put("click", new Click());
		getMap().put("clearText", new ClearText());
		getMap().put("swipe", new Swipe());
		getMap().put("getWindowSize", new GetWindowSize());
		getMap().put("getProperties", new GetProperties());
		getMap().put("getSource", new GetSource());
	}

	/**
	 * @param input
	 * @return res
	 * @throws JSONException
	 * @throws ParserConfigurationException
	 */
	static String handleInput(String input) throws JSONException,
			ParserConfigurationException {
		JSONObject json = Utils.parseJSON(input);
		String cmd = (String) json.get("cmd");
		JSONObject args = (JSONObject) json.get("args");
		return getMap().get(cmd).execute(args);
	}

	/**
	 * @return res
	 */
	public static HashMap<String, CommandBase> getMap() {
		return map;
	}

	/**
	 * @param map
	 */
	public static void setMap(HashMap<String, CommandBase> map) {
		Command.map = map;
	}
}
其中的handleInput即接受指令,然后从指令中获取命令和命令参数,并调用getMap().get(cmd).execute(args),而getMap()中的map的初始化在static域中
| 命令 | 处理类 | 作用 |
| ping | Ping() | 测试连通 |
| wake | Wake() | 模拟按电源键 |
| find | Find() | 查找页面元素 |
| setText | SetText() | 设置文本内容 |
| getText | GetText() | 获取文本内容 |
| cick | Click() | 点击元素 |
| clearText | ClearText() | 清空元素内容 |
| swipe | Swipe() | 滑动 |
| getWindowSize | GetWindowSize() | 获取手机长宽 |
| getProperties | GetProperties() | 获取手机属性 |
| getSource | GetSource() | 获取当前画面的dump的xml文件 |
4.各个处理类分析
4.1 Ping代码分析,该方法直接返回成功标志,实际上没有具体的业务含义,可能只是为了测试手机服务端启动的成功与否
public class Ping extends CommandBase {
	@Override
	public String execute(JSONObject args) throws JSONException {
		try {
			return success((Object) "it works!");
		} catch (JSONException e) {
			e.printStackTrace();
			return failed("UnknownError");
		}
	}
}
4.2 Wake 模拟电源按键,核心调用的UiDevice中的wakeUp方法
public class Wake extends CommandBase {
	@Override
	public String execute(JSONObject args) throws JSONException {
		try {
			UiDevice.getInstance().wakeUp();
			return success((Object) true);
		} catch (final RemoteException e) {
			Utils.output(e.toString());
		}
		return failed("UnknownError");
	}
}
4.3 SetText 设置文本内容,该处理类也是同样根据传递进来的ElementId获取到macaca封装的Element元素后,调用setText方法,核心也是调用的UiObject中的setText方法
public class SetText extends CommandBase {
    @Override
    public String execute(JSONObject args) throws JSONException {
        try {

            String elementId = (String) args.get("elementId");
            String text = (String) args.get("text");

            Element element = Elements.getGlobal().getElement(elementId);

            boolean needPressEnter = false;

            if (text.endsWith("\\n")) {
                needPressEnter = true;
                text = text.replace("\\n", "");
            }

            Charset UTF7 = Charset.forName("UTF-7");
            Charset ASCII = Charset.forName("US-ASCII");

            byte[] encoded = text.getBytes(UTF7);
            String str = new String(encoded, ASCII);

            boolean result = element.setText(str);

            if (needPressEnter) {
                final UiDevice d = UiDevice.getInstance();
                d.pressEnter();
            }

            return success(result);
        } catch (final UiObjectNotFoundException e) {
            return failed("NoSuchElement");
        } catch (final Exception e) {
            return failed("UnknownError");
        }
    }
}
4.4 GetText 获取文本内容,该处理类也是同样根据传递进来的ElementId获取到macaca封装的Element元素后,调用getText方法,核心也是调用的UiObject中的getText方法
public class GetText extends CommandBase {
	@Override
	public String execute(JSONObject args) throws JSONException {

		try {
			String elementId = (String) args.get("elementId");
			Element element = Elements.getGlobal().getElement(elementId);
			return success(element.getText());
		} catch (final Exception e) {
			return failed("UnknownError");
		}
	}
}
4.5 Click 点击操作 该处理类也是同样根据传递进来的ElementId获取到macaca封装的Element元素后,调用click方法,核心也是调用的UiObject中的click方法
public class Click extends CommandBase {
    @Override
    public String execute(JSONObject args) throws JSONException {
        try {
            String elementId = (String) args.get("elementId");
            Element el = Elements.getGlobal().getElement(elementId);

            el.click();
            return success(true);
        } catch (final UiObjectNotFoundException e) {
            return failed("NoSuchElement");
        } catch (final Exception e) {
            return failed("UnknownError");
        }
    }
}
4.6 ClearText 清空文本 该操作类通过参数中获取的元素id获取到元素后,直接调用Element元素的clearText方法,而Element元素是macaca自己封装的Uiautomator中的UIObject类中的clearTextField方法
public class ClearText extends CommandBase {
    @Override
    public String execute(JSONObject args) throws JSONException {
        try {
            String elementId = (String) args.get("elementId");
            Element el = Elements.getGlobal().getElement(elementId);

            el.clearText();
            return success(true);
        } catch (final UiObjectNotFoundException e) {
            return failed("NoSuchElement");
        } catch (final Exception e) {
            return failed("UnknownError");
        }
    }
}
  public UiObject element;
  /**
  * @throws UiObjectNotFoundException
  */
  public void clearText() throws UiObjectNotFoundException {
    element.clearTextField();
  }
4.7 Swipe 滑动 该处理类直接根据参数获取(开始位置坐标,结束位置坐标)+持续时间,然后直接调用UiDevice中的swipe滑动方法实现
public class Swipe extends CommandBase {
    @Override
    public String execute(JSONObject args) throws JSONException {
        try {
            Integer startX = (Integer) args.get("startX");
            Integer startY = (Integer) args.get("startY");
            Integer endX = (Integer) args.get("endX");
            Integer endY = (Integer) args.get("endY");
            Integer duration = (Integer) args.get("duration");
            boolean result = UiDevice.getInstance().swipe(startX, startY, endX, endY, duration);

            return success(result);
        } catch (final Exception e) {
            return failed("UnknownError");
        }
    }
}
4.8 GetWindowSize 获取手机长宽 直接调用UiDevice获取长度和宽度返回
public class GetWindowSize extends CommandBase {
	@Override
	public String execute(JSONObject args) throws JSONException {
		try {
			Integer width = UiDevice.getInstance().getDisplayWidth();
			Integer height = UiDevice.getInstance().getDisplayHeight();
			JSONObject size = new JSONObject();
			size.put("width", width);
			size.put("height", height);
			return success(size.toString());
		} catch(JSONException e) {
			return failed("UnknownError");
		}
	}
}
4.9 GetProperties 获取手机属性 包括元素长度、宽度、中心坐标、左上位置坐标、面积
public class GetProperties extends CommandBase {
    @Override
    public String execute(JSONObject args) throws JSONException {
        try {
            String elementId = (String) args.get("elementId");
            Element el = Elements.getGlobal().getElement(elementId);
            final Rect rect = el.element.getBounds();
            JSONObject size = new JSONObject();
            size.put("width", rect.width());
            size.put("height", rect.height());
            size.put("centerX", rect.centerX());
            size.put("centerY", rect.centerY());
            JSONObject origin = new JSONObject();
            origin.put("x", rect.left);
            origin.put("y", rect.top);
            JSONObject props = new JSONObject();
            props.put("origin", origin);
            props.put("size", size);
            return success(props.toString());
        } catch (final UiObjectNotFoundException e) {
            return failed("NoSuchElement");
        } catch (final Exception e) {
            return failed("UnknownError");
        }
    }
}
4.10 GetSource 获取当前画面的dump的xml文件 直接调用UiDevice中的dump方法生成macaca-dump.xml文件,然后在js中通过adb命令pull拉取到电脑本地文件系统中
public class GetSource extends CommandBase {

    private static final String dumpFileName = "macaca-dump.xml";

    @Override
    public String execute(JSONObject args) throws JSONException {
        try {

            final File dump = new File(new File(Environment.getDataDirectory(),
                    "local/tmp"), dumpFileName);
            dump.mkdirs();
            if (dump.exists()) {
                dump.delete();
            }
            UiDevice.getInstance().dumpWindowHierarchy(dumpFileName);
            return success(true);
        } catch (final Exception e) {
            return failed("UnknownError");
        }
    }
}
4.11 Find 查找页面元素 首先传递参数需要三个
策略:即为通过什么来获取元素,这里有class_Name、name、id、xpath
值:即策略所对应的取值
是否支持多个查询:是否支持多个查询或者找到匹配元素即返回
public class Find extends CommandBase {

	private Elements elements = Elements.getGlobal();

	@Override
	public String execute(JSONObject args) throws JSONException,
			ParserConfigurationException {
		try {
			String strategy = (String) args.get("strategy");
			String selector = (String) args.get("selector");
			Boolean multiple = (Boolean) args.get("multiple");

			strategy = strategy.trim().replace(" ", "_").toUpperCase();
			Object result = null;
			List<UiSelector> selectors = null;
			try {
				selectors = getSelectors(strategy, selector,
						multiple);
			} catch (Exception e) {
				e.printStackTrace();
			}
			boolean found = false;

			if (multiple) {
				List<Element> foundElements = new ArrayList<Element>();
				for (UiSelector item : selectors) {
					try {
						final List<Element> elementsFromSelector = getElements(item);
						foundElements.addAll(elementsFromSelector);
					} catch (final UiObjectNotFoundException ignored) {
					}
				}
				found = foundElements.size() > 0;
				result = elementsToJSONArray(foundElements);

			} else {
				for (int i = 0; i < selectors.size() && !found; i++) {
					try {
						result = getElement(selectors.get(i));
						found = result != null;
					} catch (Exception ignored) {
						Utils.output("ignored selector");
					}
				}
			}

			if (!found) {
				return failed("ElementNotFound");
			}

			return success((Object) result);
		} catch (JSONException e) {
			e.printStackTrace();
			return failed("UnknownError");
		}
	}

	/**
	 * @param strategy
	 * @param text
	 * @param multiple
	 * @return res
	 * @throws ParserConfigurationException
	 */
	private List<UiSelector> getSelectors(String strategy, String text,
			boolean multiple) throws Exception {

		final List<UiSelector> list = new ArrayList<UiSelector>();

		UiSelector selectors = new UiSelector();

		if (strategy.equals("CLASS_NAME")) {
			selectors = selectors.className(text);

			if (!multiple) {
				selectors = selectors.instance(0);
			}
			list.add(selectors);
		} else if (strategy.equals("NAME")) {
			selectors = new UiSelector().description(text);
			if (!multiple) {
				selectors = selectors.instance(0);
			}
			list.add(selectors);

			selectors = new UiSelector().text(text);
			if (!multiple) {
				selectors = selectors.instance(0);
			}
			list.add(selectors);
		} else if (strategy.equals("ID")) {
			selectors = selectors.resourceId(text);

			if (!multiple) {
				selectors = selectors.instance(0);
			}
			list.add(selectors);
		} else if(strategy.equals("XPATH")) {
			final ArrayList<UiSelector> pairs = XmlUtils.getSelectors(text);

			if (!multiple) {
				if (pairs.size() == 0) {
					throw new Exception("Could not find an element using given xpath expression.");
				}
				list.add(pairs.get(0));
			} else {
				for (final UiSelector pair : pairs) {
					list.add(pair);
				}
			}
		}

		return list;
	}

	/**
	 * @param sel
	 * @return res
	 * @throws JSONException
	 * @throws Exception
	 */
	private JSONObject getElement(final UiSelector sel) throws JSONException,
			Exception {
		final JSONObject res = new JSONObject();
		final Element element = getElements().getElement(sel);
		return res.put("ELEMENT", element.getId());
	}

	/**
	 * @param sel
	 * @return res
	 * @throws UiObjectNotFoundException
	 */
	private ArrayList<Element> getElements(final UiSelector sel)
			throws UiObjectNotFoundException {
		return elements.getElements(sel);
	}

	/**
	 * @param elems
	 * @return res
	 * @throws JSONException
	 */
	private JSONArray elementsToJSONArray(final List<Element> elems)
			throws JSONException {
		JSONArray resArray = new JSONArray();
		for (Element element : elems) {
			resArray.put(new JSONObject().put("ELEMENT", element.getId()));
		}
		return resArray;
	}

	/**
	 * @return res
	 */
	public Elements getElements() {
		return elements;
	}

	/**
	 * @param elements
	 */
	public void setElements(Elements elements) {
		this.elements = elements;
	}
}
疑问
既然macaca封装的时候通过两种方式进行封装,adb命令和uiautomator,那么何时使用adb?何时使用Uiautomator呢?带着疑问向macaca团队提出issue,相关疑问解答参考连接macaca-android驱动封装规则
原创文章,转载请注明出处!
本文链接:https://codetosurvive1.github.io/posts/macaca-source-analyze-android-uiautomator.html