webdriveragent调试及usb测试
标签:macaca, 自动化, webdriveragent, usb操作步骤
1.首先启动手机上的facebook的webdriveragent,这里直接使用macaca改造后的webdriveragent测试
npm install app-inspector -g

WEBDRIVERAGENT_PORT=8900 xcodebuild test -project /usr/local/lib/node_modules/app-inspector/node_modules/webdriveragent/WebDriverAgent/WebDriverAgent.xcodeproj -scheme WebDriverAgentRunner -destination id=7286ffb19da8cb913b629211fad1f6c8b547ba1
解释:
WEBDRIVERAGENT_PORT=8900 指定手机端启动webdriver agent服务时候绑定手机端的端口,默认8100 -project /usr/local/lib/node_modules/app-inspector/node_modules/webdriveragent/WebDriverAgent/WebDriverAgent.xcodeproj 指定facebook的webdriver agent工程代码目录
-destination id=7286ffb19da8cb913b629211fad1f6c8b547ba1 id后面的数字是真机的device id,这里使用自己的真机
运行上面代码启动服务之后,控制台打印日志如下,最后成功信息为
writeDictToFile:1278 ==== Successfully wrote Manifest cache to /var/folders/cc/tqd_99wx1wb1sgpr8pjv4w140000gn/C/com.apple.DeveloperTools/All/Xcode/EmbeddedAppDeltas/WebDriverAgentRunner-Runner.app.BgF3K6/WebDriverAgentRunner-Runner.app_sparse.ipa/ManifestCache.plist


Test Suite 'All tests' started at 2017-01-06 09:30:31.934
Test Suite 'WebDriverAgentRunner.xctest' started at 2017-01-06 09:30:31.936
Test Suite 'UITestingUITests' started at 2017-01-06 09:30:31.937
Test Case '-[UITestingUITests testRunner]' started.
    t =     0.00s     Start Test at 2017-01-06 09:30:31.941
    t =     0.01s     Set Up
2.映射手机端的端口到电脑上,使用的工具是iproxy
首先需要下载iproxy
brew install libimobiledevice

brew install usbmuxd
通过下面指令映射端口
/usr/local/bin/iproxy 8900 8900 7286ffb19da8cb913b629211fad1f6c8b547ba15
第一个8900:为电脑端的端口 第二个8900:为手机端webdriveragent服务的端口 最后的数字:为自己手机的序列号
3.测试
直接post url:http://127.0.0.1:8900/session 查看返回数据
{
  "value": "'bundleId' desired capability not provided",
  "sessionId": null,
  "status": 13
}
直接get url:http://127.0.0.1:8900/status 查看返回数据
{
  "value": {
    "state": "success",
    "os": {
      "name": "iOS",
      "version": "10.2"
    },
    "ios": {
      "simulatorVersion": "10.2"
    },
    "build": {
      "time": "Jan  6 2017 09:44:15"
    }
  },
  "sessionId": null,
  "status": 0
}
调试源代码
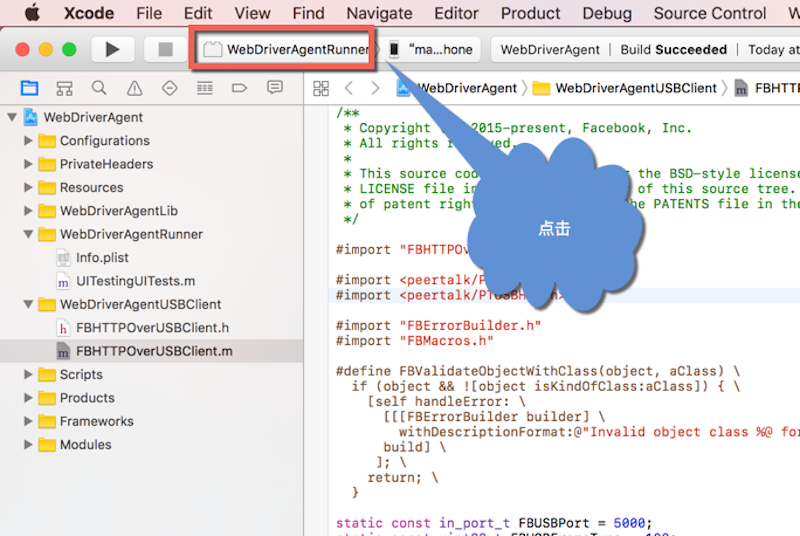
1.打开xcode项目
open /usr/local/lib/node_modules/app-inspector/node_modules/webdriveragent/WebDriverAgent/WebDriverAgent.xcodeproj
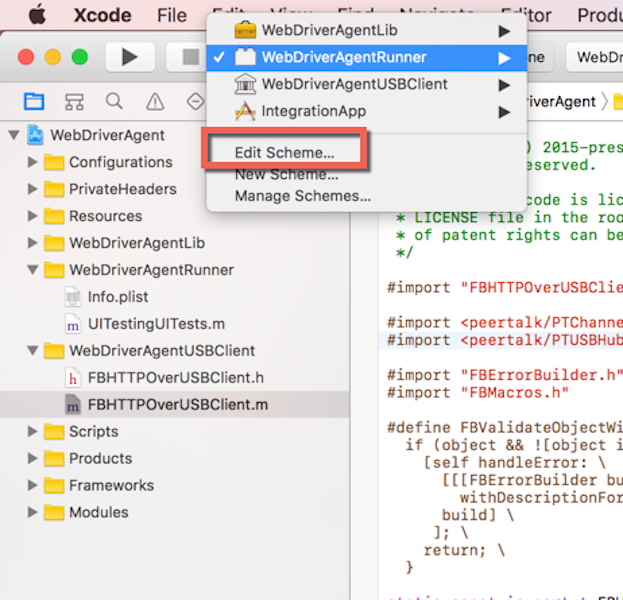
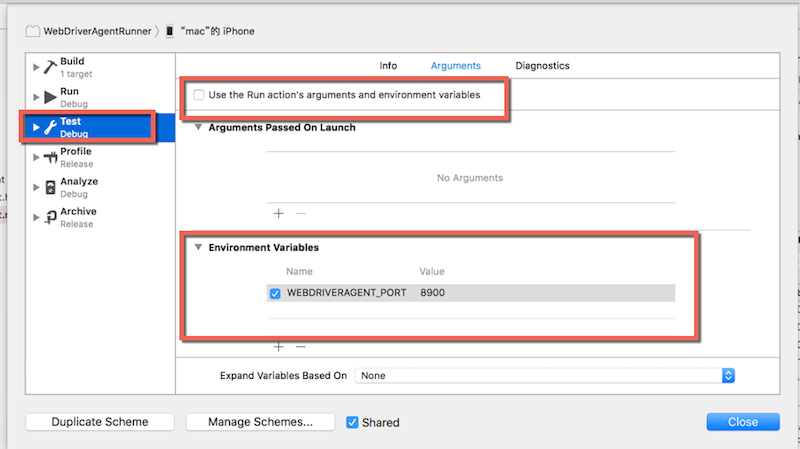
2.修改schema中的默认端口,并启动
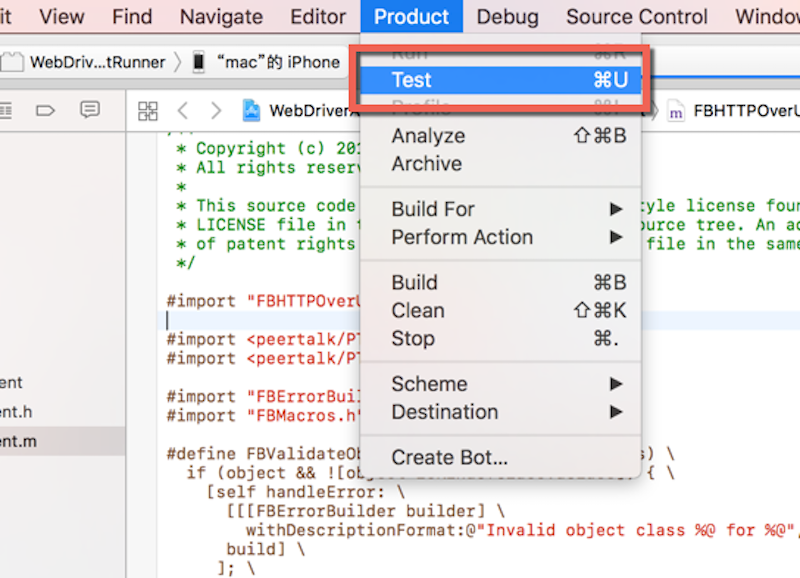
手机端会安装webdriver agent,并最小化
安装成功后控制台会显示如下信息
2017-01-06 10:17:19.907330 XCTRunner[1773:647989] Running tests...
2017-01-06 10:17:20.969984 XCTRunner[1773:647989] Continuing to run tests in the background with task ID 1
Test Suite 'All tests' started at 2017-01-06 10:17:21.651
Test Suite 'WebDriverAgentRunner.xctest' started at 2017-01-06 10:17:21.653
Test Suite 'UITestingUITests' started at 2017-01-06 10:17:21.654
Test Case '-[UITestingUITests testRunner]' started.
    t =     0.00s     Start Test at 2017-01-06 10:17:21.657
    t =     0.00s     Set Up
2017-01-06 10:17:21.670553 XCTRunner[1773:648013] [User Defaults] Failed to write value for key AutomationDisableFauxCollectionCells in CFPrefsPlistSource<0x174111820> (Domain: com.apple.Accessibility, User: kCFPreferencesCurrentUser, ByHost: No, Container: (null)): setting preferences outside an application's container requires user-preference-write or file-write-data sandbox access, switching to read-only
2017-01-06 10:17:21.672376 XCTRunner[1773:647989] Built at Jan  6 2017 10:17:06
2017-01-06 10:17:21.705725 XCTRunner[1773:647989] ServerURLHere->http://(null):8900<-ServerURLHere
2017-01-06 10:17:21.707139 XCTRunner[1773:647989] Listening on USB
看到ServerURLHere->http://(null):8900<-ServerURLHere证明启动成功
如果不进行上面的修改默认端口的话,直接test会显示如下信息,并且进行下面的3操作后是无法成功进行访问http://localhost:8100/status的
ServerURLHere->http://(null):null<-ServerURLHere
3.启动iproxy映射端口,通过usb通信
/usr/local/bin/iproxy 8900 8900 7286ffb19da8cb913b629211fad1f6c8b547ba15
4.访问http://127.0.0.1:8900/status,查看返回信息
{
  "value": {
    "state": "success",
    "os": {
      "name": "iOS",
      "version": "10.2"
    },
    "ios": {
      "simulatorVersion": "10.2"
    },
    "build": {
      "time": "Jan  6 2017 10:17:08"
    }
  },
  "sessionId": null,
  "status": 0
}
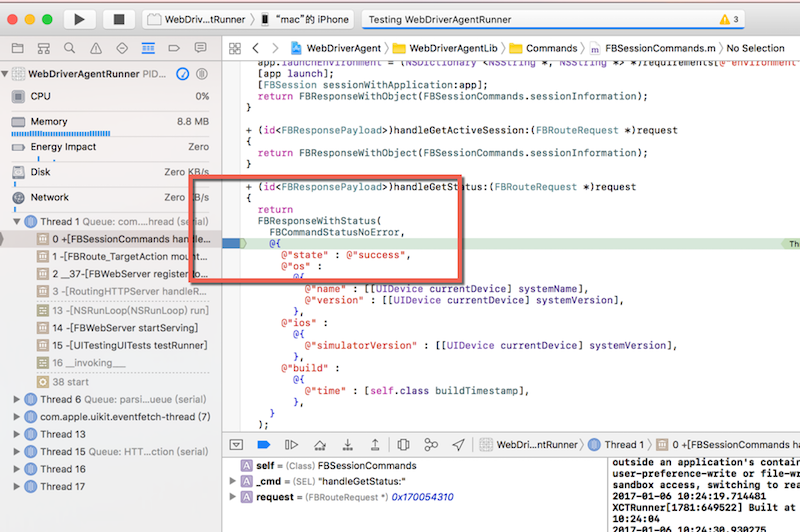
5.在打开的xcode的项目中搜索status接口,并打断点进行调试

继续访问http://127.0.0.1:8900/status,查看是否进入断点
成功进入断点
原创文章,转载请注明出处!
本文链接:https://codetosurvive1.github.io/posts/webdriver-agent-usb.html